Transfer printing is a widely used decoration method in the textile and apparel industry. It allows manufacturers to apply logos, patterns, and functional designs onto fabrics by transferring a pre-printed design from a carrier film or paper onto the final product using heat and pressure.
The Steps in the Transfer Printing Process
1. Artwork Design and Preparation
The first step is preparing the design that will be transferred onto the fabric.
The artwork usually includes: Brand logos,Text,Decorative patterns and Functional graphics.
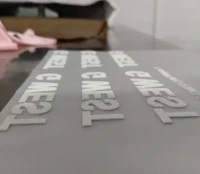
For 3D silicone heat transfer and silicone transfer labels, the design must also consider the required thickness and raised effect.
A well-prepared artwork file helps ensure accurate printing and reduces production adjustments later.
2. Preparing the Transfer Film or Paper
The transfer medium is the foundation of the process.
The carrier material needs to provide:
√ Good ink release
√ Stable dimensional performance
√ Smooth transfer surface

For high-quality silicone transfer applications, the carrier film must support precise printing and maintain the shape of the design during production.
3. Printing the Design Layers
The next step is printing the design onto the transfer carrier. For silicone heat transfer, multiple layers may be printed depending on the required effect:
● Release layer
● Color layer
● Silicone effect layer
● Adhesive layer

The order and thickness of each layer directly affect transfer performance.
4. Applying Silicone or Special Effect Materials
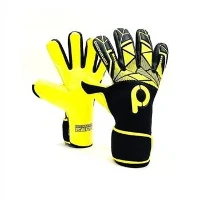
For premium applications, additional materials may be added to achieve specific effects. Examples include 3D Raised Effect,Soft Touch Effect and Functional Effects etcs. This step is especially important for products such as sportswear, gloves, socks, and performance garments.
5. Drying and Curing
After printing, the transfer material must be properly dried or cured.
This step ensures:
√ Strong layer bonding
√ Stable printing structure
√ Improved durability
For silicone-based transfer printing, temperature and curing time must be carefully controlled according to the material specifications.
6. Applying Adhesive Layer
Many transfer products require an adhesive layer to bond the design with the fabric.
A suitable adhesive system helps the transfer remain attached after Washing,Stretching and Daily wear. For B2B garment production, adhesive performance is one of the most important quality factors.
7. Heat Transfer Application onto Fabric
This is the final application stage.
The transfer is placed onto the garment surface and applied using a heat press machine.


conclusion
For professional garment manufacturers, every step influences the final result. Choosing a reliable material supplier with strong technical support helps ensure better adhesion, consistent appearance, and stable large-scale production.
With advanced silicone technology, solutions such as 3D silicone heat transfer provide brands with durable, premium decoration effects that meet the growing demand for high-quality apparel products.